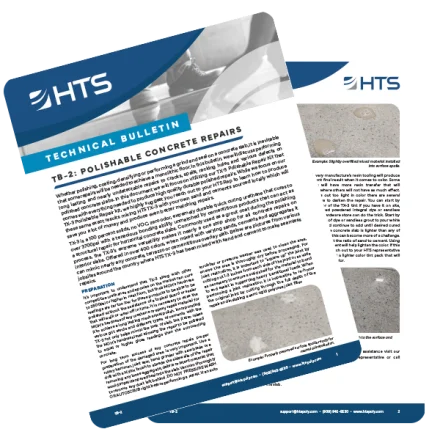
Whether polishing, coating, densifying or performing a grind and seal on a concrete slab, it is inevitable that some repairs will be needed to achieve a monolithic floor. In this bulletin, we will discuss performing long lasting and nearly undetectable repairs to cracks, spalls, racking holes and various defects on polished concrete slabs.
In this document we will focus on utilizing our TX-3 Polishable Repair Kit that comes with everything needed to produce high quality durable polished repairs. While we focus on our TX-3 Polishable Repair kit, we highly suggest you reach out to your HTS Rep to learn how to produce these same exact results mixing HTS TX-3 with your own sand and cements sourced locally which will save you a lot of money and produce even better matching repairs.
TX-3 is a 100 percent solids, no VOC, zero odor, extremely durable quick curing urethane that cures to over 3700psi with a tenacious bonding ability unmatched by cementitious products that can act as a structural repair for horizontal concrete slabs. Commonly used as a grout coat during the polishing process, the TX-3’s extreme versatility makes it nearly a one stop shop for all concrete repairs on interior slabs. Offered in over 400 colors, when mixed with varying sands, cements and aggregates it can mimic nearly any concrete, terrazzo or cementitious overlay slab.
Preparation
It’s important to understand that TX-3 along with other competitive urethanes and epoxies on the market can cure to 3500psi or higher in neat form, but their MOH’s hardness readings are far too low for these products to be able to be polished without the assistance of a topical guard or sealer that will walk or wear off in time. It is necessary to raise the MOH’s hardness of any urethane or epoxy repair material for it to achieve a long lasting mechanical polish. Incorporating various grit sands and different types of cements with the TX-3 not only helps mimic the look of slab, but it also raises the MOH’s hardness level allowing the repair to be polished to equal or higher gloss readings then the surrounding concrete.
For long term success of any concrete repair, proper preparation of the damaged area is very important. Use a rotary hammer, joint saw, hand grinder with saw blade or a drill with a Nylox brush to abrade the sidewalls of the repair removing any loose aggregate, debris or latent material that would impair proper adhesion to the slab. Vacuum thoroughly to remove any dust left behind.
DO NOT PRESSURE WASH OR AUTOSCRUB right before performing a repair. If an auto scrubber or pressure washer was used to clean the area, ensure the area is thoroughly dry before proceeding.
For joint restoration, it is important to “square up” the joint by cutting out 1-3 inches from each side of the joint or as wide as necessary to ensure a solid shelf for the material to bond to and assist in supporting heavy transitional loads. When performing a joint restoration it is imperative to re-honor the original joint by cutting through the full depth of the repair and installing a semi rigid polyurea joint filler.
Once the desired area has been properly prepped, a mixing station should be setup to protect the floor from any spillage. This mixing station should be close to the working area but not in the way of the areas that need repaired or in the way of other trades. The TX-3 Polish Repair Kit along with mixing cups, paddle mixers, wooden paint mixers, putty knife/trowel and plenty of rags should be laid out in the mixing station.
Material Installation
Now that all prep work is completed and your mixing station is setup, we will begin to dial in matching our repair to the surrounding concrete slab. On a slab requiring a large number of repairs these following steps should be completed as soon as the first few spalls are prepped to prevent further downtime or in a best case scenario the color matching process would be completed during the initial mock up.
Step-by-Step Process
Locate a spall in the concrete slab and polish a 6”x 6” section around the spall up to 400 grit with a hand grinder.
Place the six HTS Systems polished samples provided in the kit on the recently polished section of floor to select the color that matches the closest.
Thoroughly mix 4 ounces of the HTS Part C cement (this is standard white Portland cement) with 6 ounces of the provided sand (All Purpose Sand sourced from the Pacific Northwest). It is recommended to source sands and aggregate used by local concrete mix plants in your area. These sands and aggregate may slightly alter the color of the final repair vs. the provided polished samples but the final result is always best when using the same sands and aggregates in the repair that are used in the concrete.
Shake up the container of HTS TX-3 B side in the color selected for 30 seconds.
Pour 2 ounces of the selected HTS TX-3 B side into a 1 quart mixing cup.
Pour 2 ounces of HTS TX-3 A side into the 1 quart mixing cup with the 2 ounces of TX-3 B side and hand mix for 10 seconds.
Pour 6-7 ounces of the Part C cement and Sand mixture into the 1 quart cup and mix with the 4 ounces of TX-3 for 10 seconds ensuring no dry cement/sand is left.
Pour the remaining 3-4 ounces of Cement/Sand into the mixture and mix for 10-15 more seconds ensuring no dry cement or sand is left.
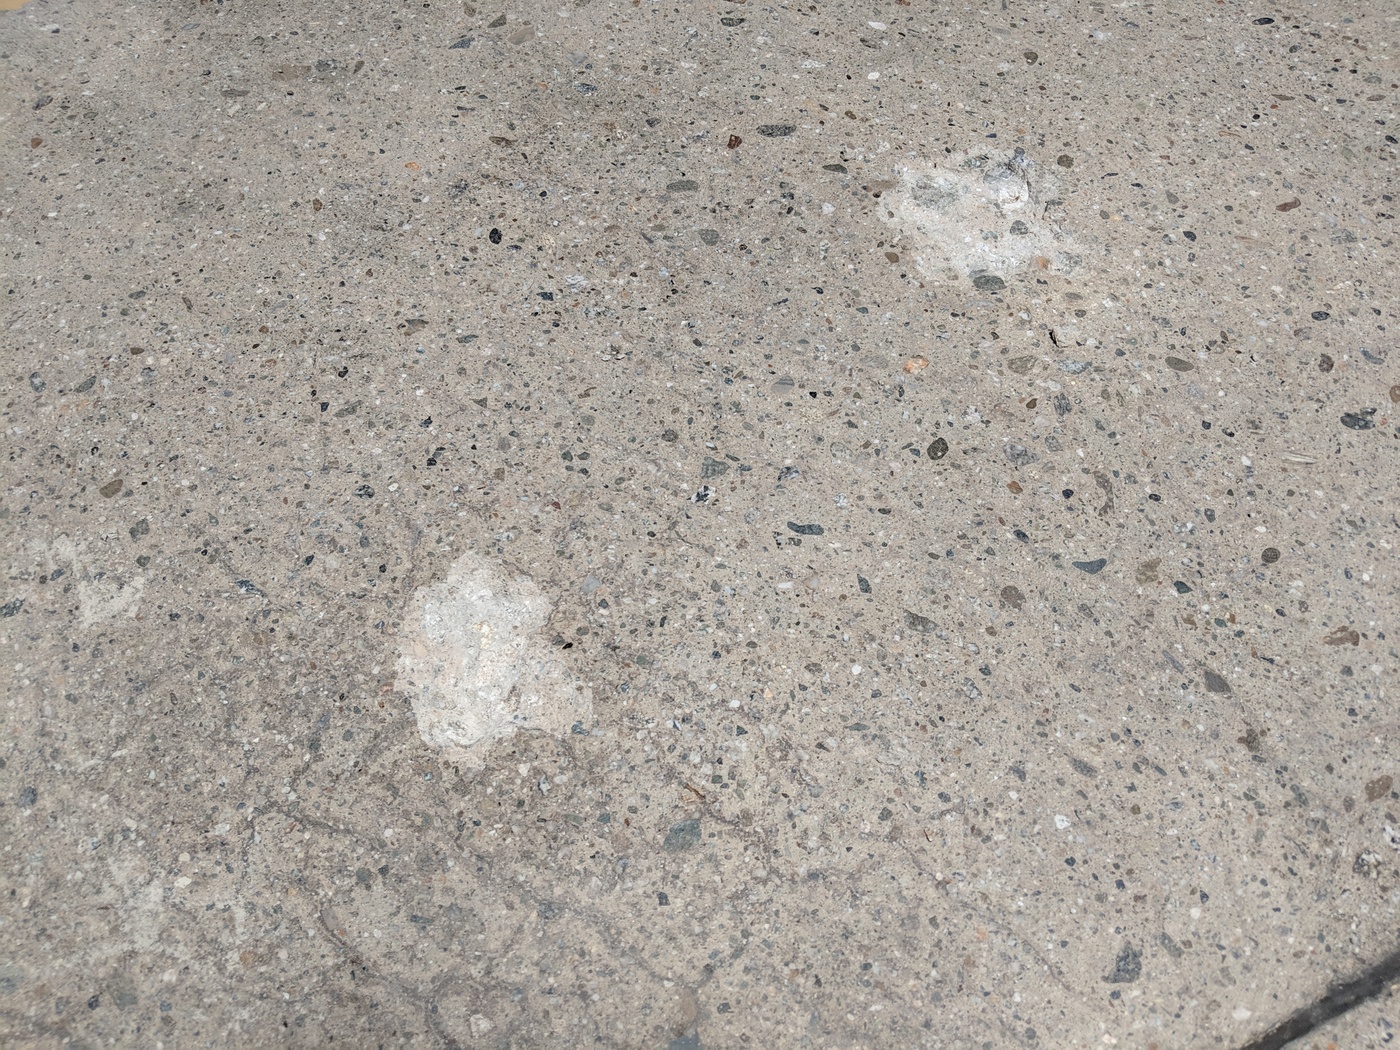
Slightly overfill the spall or damaged area of concrete with the TX-3/Cement mix and allow to cure for 40 minutes.
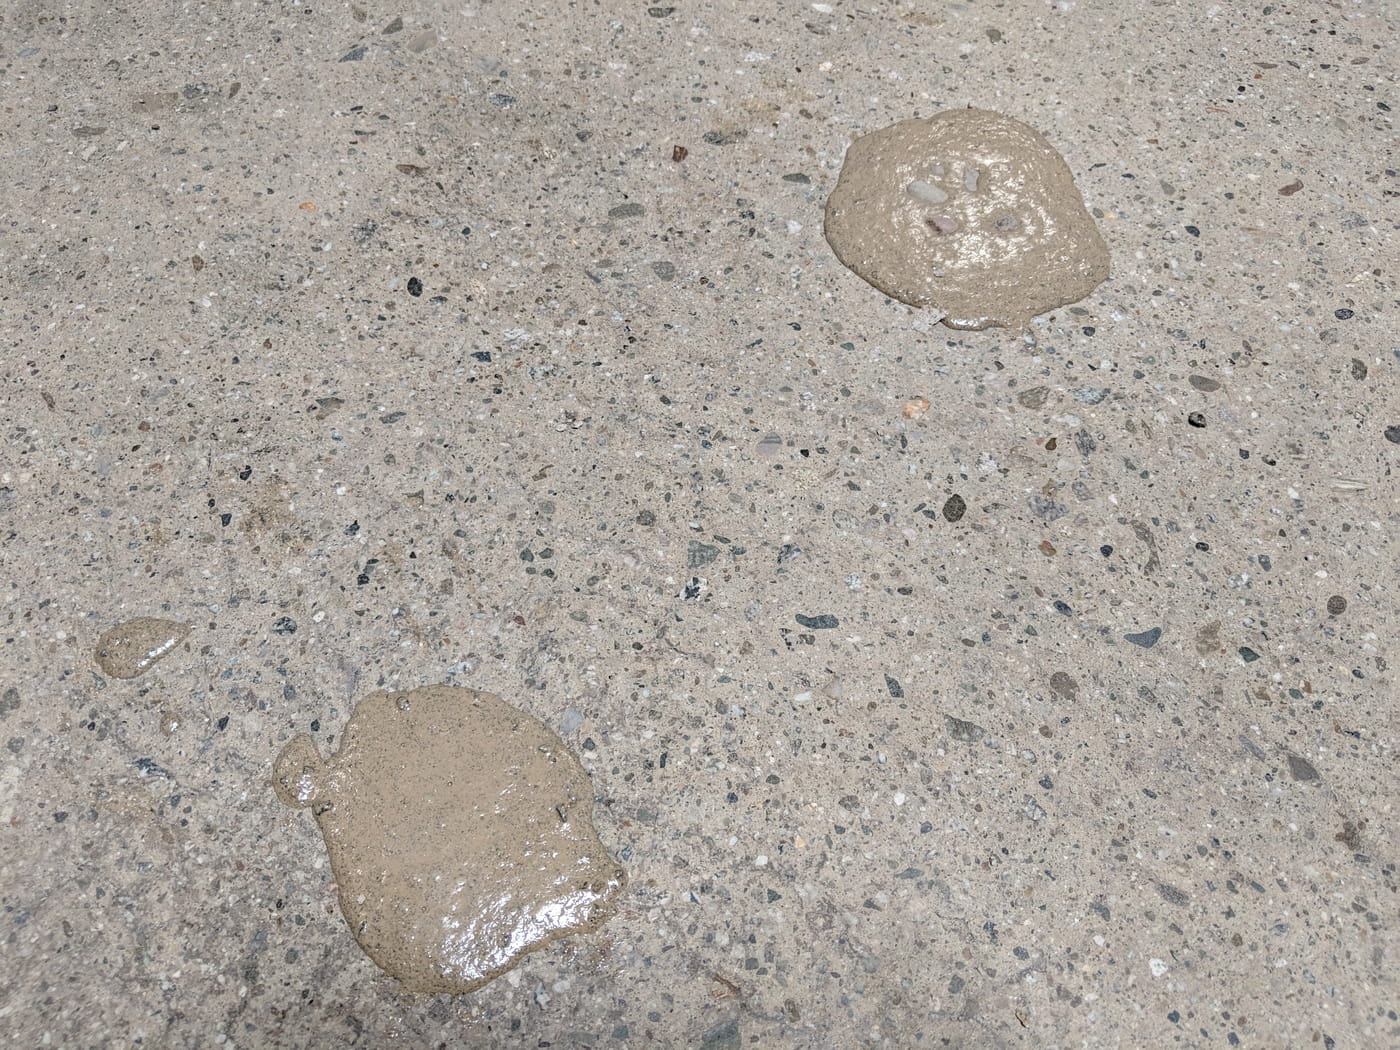
Grind repair flush with the surface and polish up to 400 grit to ensure color is acceptable before moving forward with repairing more spalls and cracks on the slab.
Color Matching Tips
Keep in mind every manufacture’s resin tooling will produce a slightly different final result when it comes to color. Some polishing resins will have more resin transfer that will brown the repair where others will not have as much effect. If the repair turns out too light in color there are several approaches to take to darken the repair. You can start by using a darker color of the TX-3 tint if you have it on site, if not, a dark colored powdered integral dye or sandless grout from a local hardware store can do the trick. Start by adding a small pinch of dye or sandless grout to your white Portland/sand mix and continue to add until desired cured color is achieved.
If the concrete slab is lighter than any of the provided 6 samples this can become more of a challenge. The first step is to adjust the ratio of sand to cement. Using more white Portland cement will help lighten the color. If this does not do the trick, reach out to your HTS representative to have them recommend a lighter color tint pack that will help achieve the desired color.